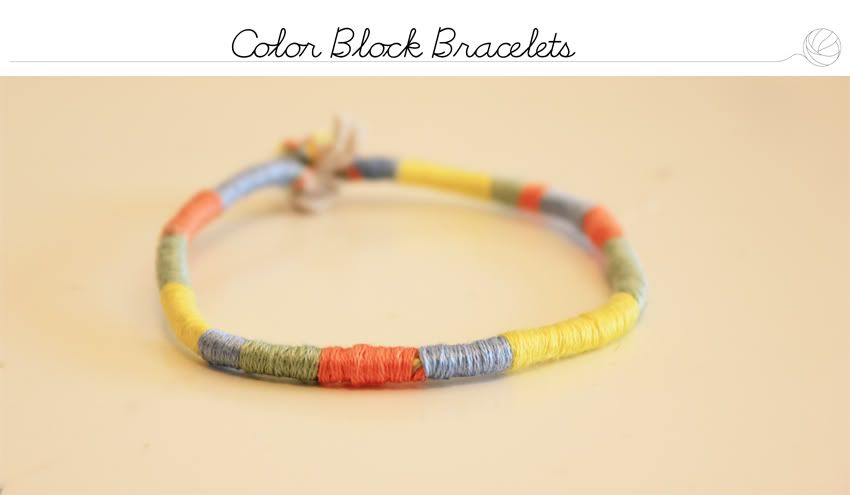
The inspiration for this color blocking bracelet came from a similar on I spotted at I spy DIY. I love how fresh these look. How different they can look, depending on the colors you use.
A inspiração para esta pulseira veio de uma muito semelhante que encontrei no blog I spy DIY. A versetalidade destas pulseiras atrai-me muito. Mudam-se as cores utilizadas e a pulseira fica com um aspecto completamente diferente.
Supplies
Thread in different colors, about 50cm to 30cm of each color, the more colors you use the shorter the string can be.
A small piece of rope/thick string that is long enough to go all around your wrist.
Scissors and needle as always.
Some glue, just to set those ends.
Materiais
Linhas de várias cores. Cerca de 50 a 30 cm de cada. Quantas mais cores utilizares, mais curtas podem ser as linhas. Eu usei linhas de bordar.
Um pequeno pedaço de cordel, deve ser comprido o suficiente, de forma a dar a volta ao pulso.
Tesoura e agulha, como sempre.
Um pouco de cola, só para fixar as pontinhas.
Step by Step
1st Step: Cut all the rope and thread you'll be needing.
1º Passo: corta toda a corda e linha que vais precisar.
2nd Step: Tie the threads around the string/rope.
2º Passo: Dá um nó com as linhas à volta do cordel.
3rd Step: Glue the knot, so it will stay in place.
3º Passo: Cola o nó, para que ele fique no lugar.
4th Step: Pick one of the threads and go around the other and the rope several times. Do not leave any space between turns. When you are happy with the length of your first color block, switch to another color and repeat.
4º Passo: Com uma das linhas, dá várias voltas sem espaçamento entre elas, às restantes linhas e ao cordel. Quando tiveres o comprimento desejado dessa cor, troca de linha e repete.
5th Step: Finish up. I decided to knot and sew the ends of mine, it is big enough to go easily through my hand but not that big that it would fall of.
5º Passo: Toque finais. Eu decidi dar um nó e cosê-lo. De forma a que seja fácil de pôr e tirar a pulseira. Ela é larga o suficiente para passar o meu punho, mas não tão larga que cai do pulso.
Now make more, in different colors and patterns and have your self an arm party.
Agora faz mais e de diferentes cores e padrões e dá uma arm party.
Hope you liked it!!!
Espero que tenhas gostado.
Check out more DIYs for bracelets here, here and here.
Espreita mais DIYs de pulseiras aqui, aqui e aqui.


ohhhhhh nice!
ReplyDeletehttp://prettylittletitch.blogspot.co.uk/
http://www.etsy.com/shop/prettylittletitch
love it!
ReplyDeletewith love,
confashionista-blog.blogspot.com
great DIY :) i will try to make it for sure :)
ReplyDeleteI just started my own blog, check it out!
irene-in-fashionland.blogspot.com
Super cool bracelet...Amazing DIY...thanks for sharing because i remember the same of ARDEN, jajaja
ReplyDeleteXOXO from MUNICH
La Vie Quotidienne
www.laviequo.com
nice idea!
ReplyDeleteJasmin
http://www.my-berlin-fashion.com/
nice!:):)
ReplyDeletefunn! x
ReplyDelete